Category: Cooking Techniques & Skills

  • The Art of Seasoning: Why Salt, Acid, Fat, and Heat Change Everything

    The Art of Seasoning: Why Salt, Acid, Fat, and Heat Change Everything

    Cooking Techniques & Skills

    Most dishes that taste “fine but flat” are missing one of four things. Learn to diagnose which, and you stop needing the recipe to tell you.

    Here is a scenario every home cook knows. You’ve followed the recipe exactly. Nothing went wrong. The soup, the stew, the roasted vegetables — they’re perfectly edible. And yet the whole thing sits there tasting muted, vaguely disappointing, like a photograph slightly out of focus. You add more salt. It gets saltier and no better. You add herbs. Now it tastes like flat food with herbs in it. What’s actually missing is almost never an ingredient; it’s a variable. And there are only four that really matter.

    Salt, acid, fat, and heat are the levers every cook is pulling, whether they know it or not. Salt makes flavors legible. Acid provides contrast and lift. Fat carries flavor and delivers texture. Heat determines what chemistry happens at all. Professional cooks think in these terms constantly, which is why a chef tasting your dish can usually fix it in one move — they’re not adding a secret ingredient, they’re identifying which of the four is out of balance. The great practical value of this framework is diagnostic: instead of asking “what could I add?”, you learn to ask “which lever is wrong?” That question has four possible answers, and you can usually taste your way to the right one in about ten seconds.

    Salt: not a flavor, an amplifier

    The most common misconception about salt is that it makes food salty. It does, past a certain point — but well before that point, its main job is entirely different. Salt suppresses our perception of bitterness, which allows sweetness and savoriness to come forward; it enhances aroma release; and it makes the existing flavors in a dish more distinct from one another. Correctly salted food doesn’t taste salty. It tastes more like itself. This is why the same tomato can be watery and dull or intensely tomato-flavored depending on nothing but a pinch, and why undersalted food is so often described as “bland” rather than “unsalted” — the failure registers as an absence of flavor generally, not of salt specifically.

    Timing matters as much as quantity, and this is where most home cooks lose ground. Salt added early has time to migrate: it penetrates meat, draws moisture from vegetables and then gets reabsorbed with it, and seasons food from within rather than sitting on the surface. Salting a chicken hours ahead (a dry brine) produces meat that tastes seasoned all the way through and holds moisture better; salting it as it hits the pan produces a salty crust over bland flesh. Season in layers — a little at each stage, tasting as you go — rather than dumping it all in at the end. And remember that reduction concentrates salt: a sauce seasoned perfectly at the start will be over-salted by the time it has halved, which is why experienced cooks under-season anything they plan to reduce.

    Salt type Character Best for
    Kosher / flaked Large, light crystals; easy to pinch and see General cooking — the professional default
    Fine sea salt Dense, dissolves fast, much saltier by volume Baking, brines, anything weighed
    Table salt Very fine and dense; often iodized Measured baking; use less by volume
    Finishing flakes Crunchy pyramids that stay crystalline Sprinkled at the table for texture and pop

    The crystal-size difference is not trivia — a tablespoon of table salt contains far more salt than a tablespoon of coarse kosher salt, which is why swapping between them by volume is one of the classic ways to ruin a dish. Pick one salt, use it for everything, and your hand will calibrate to it within a couple of weeks. On the health side, sodium intake is a genuine consideration for many people and general guidance is available from organizations like the American Heart Association; cooking at home already puts you well ahead, since the large majority of dietary sodium in most populations comes from processed and restaurant food rather than the salt cellar. Anyone managing blood pressure or a specific condition should follow the advice of their own healthcare professional rather than a cooking article.

    Acid: the most under-used tool in the home kitchen

    If salt is the lever home cooks over-reach for, acid is the one they forget exists. Ask a professional what’s wrong with a rich dish that tastes heavy, muddy, or one-note, and the answer will very often be “it needs acid” — a squeeze of lemon, a splash of vinegar, a spoonful of pickle brine. Acid works by contrast. Richness without acidity flattens on the palate after two or three bites, because there’s nothing to reset it; a bright note cuts through fat, sharpens the outlines of other flavors, and makes the whole dish feel lifted rather than sludgy. It’s the reason vinaigrette rescues a heavy salad, why lemon belongs with fried fish, why a pickle sits beside a rich sandwich, and why almost every cuisine has evolved a sour condiment to eat alongside its fattiest dishes.

    The trick is that acid, used well, should not register as sourness. Add lemon to a soup a few drops at a time and you’ll reach a point where the soup suddenly tastes clearer and more vivid without tasting lemony at all — that’s the target. Go further and you cross into obvious tartness, which is a different, sometimes desirable effect but no longer a corrective. Different acids also bring their own personalities: lemon is bright and floral, lime sharper and more aromatic, red wine vinegar assertive, sherry vinegar nutty, rice vinegar mild and slightly sweet, tomatoes and yogurt and buttermilk acidic in gentler, more integrated ways. Keep three or four on hand and reach for them deliberately.

    The ten-second diagnostic

    Tastes flat and lifeless? Salt. Tastes heavy, muddy, or tiring after a few bites? Acid. Tastes thin, harsh, or like the flavors don’t hang together? Fat. Tastes correct but boring, with no depth? You needed more browning — that’s heat, and it has to happen earlier.

    Fat: the carrier and the texture

    Fat does three distinct jobs and it’s worth separating them. First, it’s a solvent: a great many aroma compounds are fat-soluble rather than water-soluble, which means fat literally carries flavor to your palate and holds it there, giving dishes their lingering finish. This is why blooming spices in oil extracts far more from them than stirring them into a watery broth, and why a fat-free version of almost anything tastes shorter and thinner. Second, fat is a cooking medium that reaches far higher temperatures than water, which is what makes frying, sautéing, and searing possible at all. Third, fat is texture — richness, mouthfeel, the silkiness of an emulsified sauce, the tenderness of a pastry.

    Choosing fats is mostly about matching flavor and heat tolerance. Neutral oils with high smoke points handle searing and frying without breaking down; butter browns beautifully but burns readily unless clarified or buffered with oil; extra-virgin olive oil is a flavor in its own right and shines in dressings and gentle cooking; animal fats like duck fat and rendered pork fat carry enormous savory character. Just as important is when fat goes in. A finishing drizzle of good olive oil, a knob of butter swirled into a sauce off the heat, a spoonful of chili oil over a finished bowl — these deliver aroma at full strength precisely because they haven’t been cooked. Much of what makes restaurant food taste like restaurant food is a final addition of fat that home cooks skip.

    Heat: the one you can’t fix at the end

    Salt, acid, and fat can all be adjusted at the last moment. Heat cannot, and that asymmetry is the most important practical fact in this article. Heat determines which chemical reactions occur, and the flavor-creating ones require temperatures that only happen under specific conditions. The Maillard reaction — responsible for the savory, roasted complexity of browned meat, seared vegetables, toasted bread, and coffee — needs a dry surface and temperatures well above the boiling point of water. Caramelization, the browning of sugars, needs higher temperatures still. Neither can happen in a wet, crowded pan, because the food is effectively steaming at 100 °C no matter how high the burner is turned. If you didn’t build that flavor at the beginning, no amount of seasoning at the end will conjure it.

    Heat approach What it produces Requires
    High, dry (sear, roast, grill) Browning, crust, roasted complexity Dry surface, hot pan, no crowding
    Moderate, fatty (sauté, fry) Even color, crisp edges, bloomed aromatics Enough fat, steady temperature
    Low, wet (braise, simmer, poach) Tenderness, melded flavors, gelatin Time and gentle temperature control
    Very low / residual Delicate proteins, custards, infusions Patience and attention

    Two rules cover most heat mistakes. First: dry the food and don’t crowd the pan. Surface moisture must evaporate before browning begins, and packing the pan drops its temperature and traps steam — work in batches even though it feels tedious. Second: preheat properly and stop moving things. A pan that isn’t hot enough gives you grey, stuck food; constant stirring prevents any one surface from staying in contact long enough to brown. The underlying chemistry of these reactions — and the enormous number of aroma compounds they generate — is well documented in the food-science literature from bodies like the American Chemical Society and the Institute of Food Technologists, but the kitchen version is short: dry, hot, uncrowded, undisturbed.

    The fifth element nobody lists: savoriness

    Worth adding to the framework is umami — the savory depth associated with glutamates and certain nucleotides, present in aged cheeses, tomatoes, mushrooms, cured meats, anchovies, fish sauce, soy sauce, miso, seaweed, and long-simmered stocks. Umami-rich ingredients don’t announce themselves the way salt or acid do; they operate underneath, giving a dish the sense of having depth and having been cooked for a long time. This is why a teaspoon of fish sauce disappears entirely into a bolognese while making it taste meatier, why a parmesan rind transforms a bean soup, and why a spoonful of miso improves a vegetable braise nobody would describe as Japanese. When a dish tastes correct in every measurable way but somehow thin, a small umami addition is usually the missing piece.

    The overlapping variables are also worth noticing. Some ingredients pull two levers at once — capers bring salt and acid, cured pork brings salt and fat and umami, browned butter brings fat and the products of heat. Cooks develop intuition partly by learning which single addition solves two problems simultaneously, which is why a chef reaching for anchovy or a splash of vinegar so often looks like a magic trick to an onlooker.

    How to build the instinct

    The whole framework is worthless unless you taste, and most home cooks taste far too little. Professionals taste constantly — at every stage, with a clean spoon each time — because seasoning is iterative, not a single decision made at the end. Build the habit deliberately: taste before you season, taste after, and try to name what changed. A useful exercise is to make a simple soup or a plain pot of beans, divide it into four bowls, and adjust each one differently — one with extra salt, one with a squeeze of lemon, one with a swirl of good oil, one with a dab of miso. Tasting them side by side teaches more in five minutes than a month of reading, because you experience the levers in isolation.

    Adjust in small increments and give each one a moment to register — there’s no undo, and the most common seasoning error after under-salting is over-correcting in a panic. Season in layers throughout cooking rather than once at the end, since flavors added early integrate while those added late sit on top. And be willing to add two things at once when the diagnosis calls for it: a dish that’s both flat and heavy needs salt and acid, and adding only one will leave you convinced it didn’t work.

    What this framework ultimately gives you is independence from recipes. A recipe is one cook’s solution to one set of ingredients on one particular day — their tomatoes were sweeter or more acidic than yours, their salt was a different crystal size, their pan held heat differently. Once you can taste a dish and identify which lever is out of balance, the recipe becomes a suggestion rather than an instruction, and the difference between a good cook and a great one starts to look less like knowledge and more like attention. Salt, acid, fat, heat — and a spoon in your hand. That’s genuinely most of it.
  • Fermentation at Home: How to Turn Simple Ingredients Into Complex Flavors

    Fermentation at Home: How to Turn Simple Ingredients Into Complex Flavors

    Cooking Techniques & Skills

    Cabbage, salt, and time become sauerkraut. Flour and water become sourdough. Fermentation is the oldest flavor technology we have — and the most rewarding one to run in your own kitchen.

    Consider what happens in a jar of shredded cabbage and salt. Nobody adds flavor. Nobody applies heat. Yet within a week, something crisp and bland has become sour, aromatic, faintly fizzy, and complex in a way no amount of seasoning could achieve. The transformation is entirely the work of microorganisms — lactic acid bacteria already present on the vegetable, given the conditions they need to outcompete everything else and rearrange the food’s chemistry from the inside. Fermentation is, in the most literal sense, cooking without fire, and it is the oldest deliberate flavor technology human beings possess.

    Almost every cuisine rests on it. Bread, cheese, yogurt, wine, beer, vinegar, soy sauce, miso, fish sauce, kimchi, sauerkraut, pickles, olives, chocolate, coffee, tempeh, prosciutto, kefir — strip fermented foods out of the world’s kitchens and what remains is unrecognizable. Several fermented food traditions, from Korean kimjang to Japanese and Mediterranean practices, appear on UNESCO’s intangible cultural heritage lists at ich.unesco.org, recognized as living cultural knowledge rather than mere food processing. And the technique is genuinely accessible: the entry-level projects need no equipment beyond a jar, no ingredient beyond salt, and no skill beyond attention. What they do need — and this article takes seriously — is an understanding of how to do them safely.

    What fermentation actually is

    Fermentation is controlled microbial activity: you create conditions that favor specific beneficial microbes and disfavor everything else, then let them work. In vegetable fermentation — the family that includes sauerkraut, kimchi, and brined pickles — the workers are lactic acid bacteria, which consume sugars in the vegetable and excrete lactic acid. That acid progressively lowers the pH of the environment, and as it does, it makes the jar increasingly inhospitable to spoilage organisms while the acid-tolerant lactic bacteria carry on happily. The souring is simultaneously the flavor, the texture change, and the preservative mechanism. It is a beautifully self-reinforcing system.

    Three conditions steer it. Salt selectively inhibits many undesirable microbes while lactic acid bacteria tolerate it well, which is why concentration matters and why “a bit of salt” is not a recipe. Anaerobic conditions — keeping the vegetables submerged beneath the brine — matter because the microbes you want thrive without oxygen while molds and many spoilage organisms need it; anything floating above the liquid is where problems start. Temperature sets the pace: cool rooms ferment slowly and tend to produce cleaner, more complex results, while warm rooms ferment fast and can turn soft or off-tasting. Get those three right and the process largely runs itself. Get them wrong and you’ll know, because fermentation is unusually communicative about its own health.

    Safety first — and the one distinction that matters most

    Before any recipe, the essential framing. Vegetable fermentation with adequate salt has an excellent safety record, precisely because the rapidly falling pH is itself protective, and it is a reasonable beginner project when done by the book. But “by the book” is doing real work in that sentence, and home food preservation is an area where improvisation carries genuine risk. The most important rule is this: fermenting is not canning, and the two must never be casually combined. Sealing low-acid foods in airtight jars without following a tested process can create exactly the oxygen-free, low-acid conditions in which Clostridium botulinum produces botulinum toxin — a rare but extremely serious hazard. Fermented vegetables belong in the refrigerator or in vessels that vent gas, not sealed and shelf-stored on improvised terms.

    The practical version of this is simple: follow tested, science-based recipes from a reputable source rather than scaling salt down by feel or adapting a method from an unverified post. The National Center for Home Food Preservation publishes research-tested procedures for fermented vegetables and home preservation generally, and it is the reference worth bookmarking before you begin. General food-safety guidance is available from FoodSafety.gov, and the Centers for Disease Control and Prevention maintains public information on botulism and its association with improper home preservation. Certain projects — fermenting meat and fish, garlic-in-oil preparations, anything low-acid intended for shelf storage — carry meaningfully higher risk and should be left to those following validated commercial or extension-tested protocols. This article stays deliberately within the beginner-safe territory of salted vegetables, sourdough, and dairy cultures.

    When in doubt, throw it out

    Discard any ferment that smells genuinely putrid or rotten rather than sour, shows fuzzy or colored mold, has slimy or badly softened texture with an off odor, or comes from a jar that is bulging, leaking, or spurting when opened. Never taste something to decide whether it’s safe. A jar of cabbage costs almost nothing; the alternative isn’t worth it.

    Four projects to start with

    These are the classic on-ramps, roughly in order of forgiveness. Use tested recipes for the specifics; the table is a map of the territory, not a substitute for a proper procedure.

    Project What’s needed Timeframe Difficulty
    Sauerkraut Cabbage, salt, a jar, a weight 1–4 weeks Easiest — start here
    Brined vegetables Cucumbers, carrots, beans + salt brine 3 days–3 weeks Easy
    Kimchi Napa cabbage, salt, chili, aromatics 2 days–weeks Easy–moderate
    Sourdough starter Flour, water, patience 7–14 days to establish Moderate, ongoing
    Yogurt / kefir Milk + culture, warm holding 6–24 hours Easy with a tested method

    Sauerkraut earns its place at the top of the list because it teaches everything. You shred cabbage, weigh it, add salt at the proportion your tested recipe specifies, and then massage or pound it until the cells break down and release enough liquid to submerge the whole mass in its own brine. That’s it — no added water, no starter culture, no special equipment beyond something to keep the cabbage under the surface and a lid that lets carbon dioxide escape. Within a day or two you’ll see bubbles; within a week the smell shifts from cabbage to something distinctly sour and appetizing. Taste it periodically and refrigerate when it reaches a sourness you like, which halts the process almost completely.

    Reading your ferment

    Beginners worry most about telling normal fermentation from spoilage, and the reassuring truth is that healthy ferments look and smell distinctly healthy. Bubbling, cloudy brine, a pleasantly sour or tangy aroma, and a gradual color shift are all signs the process is working. A thin, flat, wrinkly white film on the surface is usually kahm yeast — harmless if unappealing, generally skimmed off, and a signal that oxygen is reaching the surface. Fuzzy growth in blue, green, black, or pink is mold, and that is a different matter entirely: with a surface mold on a large ferment some sources permit removal, but for home cooks without experience the safe default is simply to discard the batch and restart with better submersion.

    You see What it means What to do
    Bubbles, cloudy brine Active, healthy fermentation Nothing — carry on
    Sour, tangy, pickly smell Lactic acid doing its job Taste; refrigerate when you like it
    Flat white film Likely kahm yeast; oxygen exposure Skim, improve submersion
    Fuzzy colored growth Mold Discard the batch
    Putrid or rotten smell Spoilage, not fermentation Discard — do not taste
    Slimy, mushy texture Often too warm or too little salt Discard; adjust conditions next time

    Most beginner failures trace to one of three causes, and all three are easy to fix. Vegetables floating above the brine invite mold — use a proper weight, a glass insert, or even a small water-filled bag to hold everything under. Too little salt weakens the selective pressure that keeps unwanted microbes out — weigh it rather than eyeballing, and don’t reduce it below what your tested recipe specifies. A kitchen that’s too warm accelerates everything past the point of control — find the coolest reasonable spot, and expect summer ferments to move much faster than winter ones.

    Cooking with what you’ve made

    Fermented ingredients are flavor concentrates, and their real value in a kitchen is as seasoning rather than as side dishes. They deliver acidity, salt, and glutamate-rich savoriness simultaneously, which is why a spoonful of kimchi juice can rescue a flat soup and why finely chopped sauerkraut folded into a potato salad does more than vinegar alone. Use the brines — they’re intensely flavored and work beautifully in dressings, marinades, and bloody-mary-style drinks. Add ferments at the end rather than cooking them hard, since prolonged heat destroys both the delicate aromatics and any live cultures.

    On the health claims that surround fermented foods, a measured word is warranted. Fermented foods are a normal, well-established part of many traditional diets, and research into the gut microbiome and the effects of fermented foods is an active and genuinely interesting area — but it is also an area where popular claims frequently run well ahead of the evidence, and no food should be treated as a treatment for a medical condition. Balanced, science-based summaries of what’s known about diet and health are maintained by resources such as Harvard’s Nutrition Source. It’s also worth noting that fermented foods are typically high in sodium, that some people find them uncomfortable to digest, and that anyone who is pregnant, immunocompromised, or managing a health condition should raise dietary changes with a qualified healthcare professional rather than a recipe blog. Enjoy ferments because they’re delicious and interesting; treat the health enthusiasm with the same friendly skepticism you’d apply to any wellness trend.

    What keeps people fermenting, in the end, isn’t nutrition or thrift — it’s that the process is quietly astonishing. You put cabbage and salt in a jar, walk away, and return to something you could not have made by any other means, produced by organisms you never introduced, following rules that predate every cuisine on earth. Start with one jar of sauerkraut. Follow a tested recipe, keep everything under the brine, taste it every few days, and pay attention to what changes. You’ll learn more about how flavor is built in those three weeks of doing almost nothing than in a month of active cooking — and you’ll have discovered a technique that, once understood, quietly improves everything else you make.

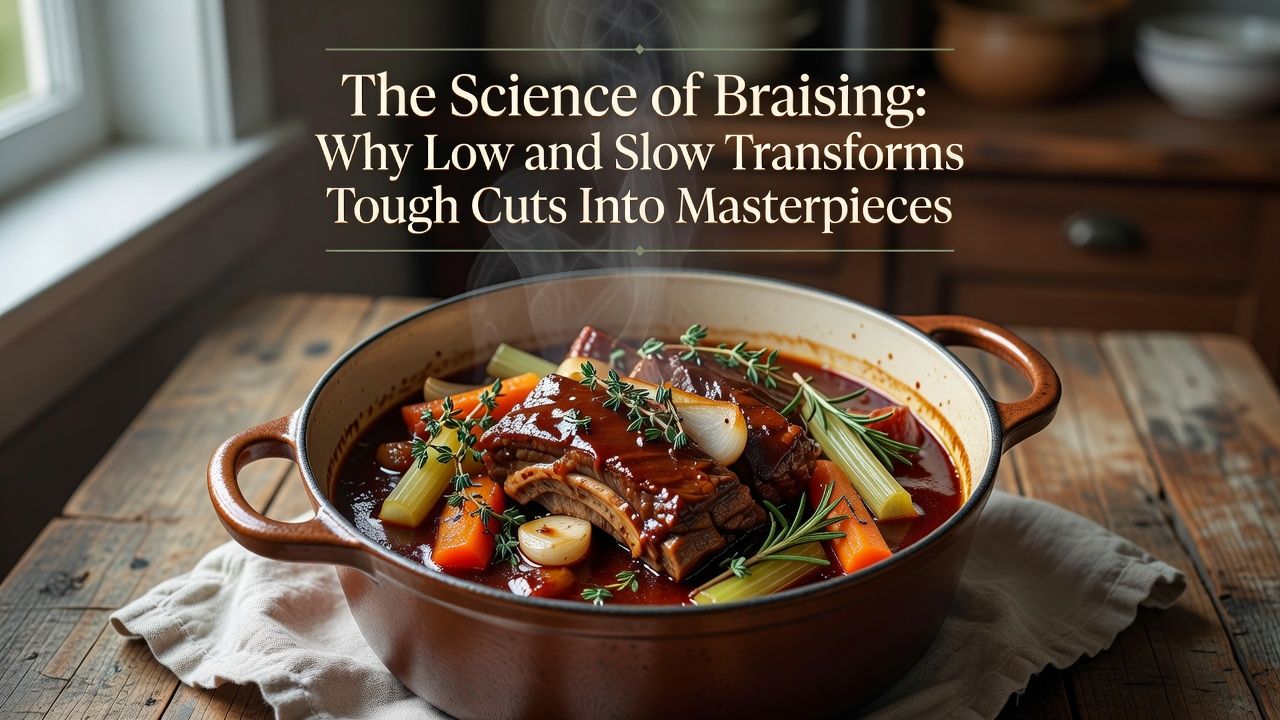
  • The Science of Braising: Why Low and Slow Transforms Tough Cuts Into Masterpieces

    The Science of Braising: Why Low and Slow Transforms Tough Cuts Into Masterpieces

    Cooking Techniques & Skills

    The cheapest cuts make the best braises, and that isn’t a coincidence — it’s collagen chemistry. Here’s what’s happening in the pot, and how to use it.

    There is a paradox at the heart of braising that trips up every cook who comes to it from grilling or roasting. Take the finest steak in the shop — a well-marbled ribeye, a tenderloin — and braise it for three hours, and you will produce something dry, stringy, and profoundly disappointing. Take the cut nobody wants, the shin or the shoulder or the oxtail, laced with tough connective tissue and sold for a fraction of the price, and give it the same treatment, and you produce something meltingly tender, deeply savory, and better than the steak ever was. This isn’t culinary folklore or thrift dressed up as virtue. It’s a specific, well-understood chemical transformation, and once you know what it is, you stop following braising recipes and start improvising them.

    Braising means cooking in a covered vessel with a modest amount of liquid, at a low temperature, for a long time — usually after browning the surface first. It appears in essentially every cuisine that has ever had to make hardworking animals delicious: French daube and bœuf bourguignon, Italian osso buco and stracotto, Mexican barbacoa and birria, Chinese red-cooked pork, Korean galbi-jjim, Moroccan tagines, American pot roast. The universality is a clue. These traditions didn’t share recipes; they independently discovered the same physical process, because the process works. Understanding it means understanding four interlocking things: what collagen does, what heat does to muscle fiber, what browning contributes, and why the liquid level matters more than almost anyone expects.

    Collagen: the whole reason braising exists

    Muscles that work hard — legs, shoulders, necks, tails — are bound together by connective tissue, and the main structural protein in that tissue is collagen. In its raw state collagen is arranged in tough, tightly wound triple helices, which is exactly why these cuts are chewy if you cook them quickly. Sear a piece of beef shin like a steak and the collagen simply tightens, squeezing the meat and making it tougher than when you started. Nothing you do at high speed will fix this.

    But collagen has a remarkable property: held in the presence of moisture at temperatures above roughly 70 °C, those helices gradually unwind and hydrolyze into gelatin. This conversion is slow — it is a function of both temperature and time, which is why “low and slow” is not a poetic phrase but a literal instruction — and it changes everything about the eating experience. Gelatin is soluble, silky, and moisture-retaining. It dissolves into the surrounding liquid, giving braising sauces their characteristic body and glossy lip-coating richness without any added thickener at all. It also lubricates the meat fibers themselves, which is why properly braised shoulder feels succulent even though it has, technically, lost a great deal of water. The cuts with the most connective tissue therefore have the most to gain, and the tender cuts — which have almost none — have nothing to gain and everything to lose.

    Cut Why it braises well Rough time at 150 °C
    Beef shin / shank Very high collagen; produces the richest, most gelatinous sauce 3–4 hours
    Beef chuck / shoulder Good collagen plus intramuscular fat; the reliable all-rounder 2.5–3.5 hours
    Oxtail Bone, marrow and collagen together — exceptional body 3–4 hours
    Pork shoulder / butt Fat and collagen in balance; very forgiving of overcooking 3–4 hours
    Lamb shoulder / shank Strong flavor that stands up to long aromatics 2.5–3.5 hours
    Chicken thighs Enough connective tissue to stay moist; the fast option 40–60 minutes

    The tug-of-war: fibers tighten while collagen melts

    Here is the complication that explains most braising failures. While collagen is slowly converting to gelatin, the muscle fibers themselves are doing the opposite: as they heat, their proteins denature and contract, squeezing out moisture. By the time a braise is finished, the meat has typically lost a substantial share of its original water. Braising is therefore a race — you need enough time at temperature to convert the collagen, but every extra minute is also drying the fibers. Perfect braising is the point at which those two curves cross most favorably.

    This is precisely why temperature control matters so much. A braise that boils vigorously is not cooking faster in any useful sense — it’s driving the fiber contraction hard while gaining relatively little on the collagen front, and the result is meat that shreds into dry, stringy threads even though it’s technically “tender.” A gentle braise, where the liquid barely trembles and you see only an occasional lazy bubble, gives collagen the long window it needs while treating the fibers as kindly as possible. In practice this means an oven at around 135–160 °C rather than a stovetop simmer, because the oven surrounds the pot with even, moderate heat instead of blasting the base. If you must braise on the stove, use the lowest setting that maintains movement and a heat diffuser if you have one.

    The doneness test that actually works

    Forget the clock and forget the thermometer. A braise is done when a skewer or paring knife slides into the thickest part and out again with no resistance at all — not “some” resistance, none. If it grips even slightly, put the lid back on and give it another thirty minutes. Braises are remarkably forgiving of extra time and completely unforgiving of being pulled early.

    Why you brown first: the Maillard reaction

    Searing meat before braising does not, despite the persistent myth, “seal in the juices” — no crust is waterproof, and browned meat loses moisture at much the same rate. What browning actually does is create flavor that cannot be produced any other way. At surface temperatures well above the boiling point of water, amino acids and reducing sugars undergo the Maillard reaction, a cascade of chemistry that generates hundreds of new aromatic compounds responsible for the roasted, meaty, deeply savory character we associate with browned food. Because the interior of a braise never exceeds the boiling point of its liquid, none of this can happen once the pot is closed. Whatever browning you want, you have to build before the liquid goes in.

    Doing it properly requires patience that most cooks don’t give it. Dry the meat thoroughly with paper towels — surface water must evaporate before browning can begin, and wet meat steams instead. Use a heavy pan, get it genuinely hot, and work in batches with space between the pieces; crowding drops the pan temperature and traps steam, and you’ll end up with grey meat and a wasted twenty minutes. Aim for a deep mahogany crust rather than a timid tan. Then brown the aromatics in the same fat, and — crucially — deglaze: add wine, stock, or even water and scrape up the browned fond stuck to the pan bottom. That fond is concentrated Maillard product, and leaving it behind throws away most of what you just made. The same chemistry underlies flavor development across countless cooking processes, and it’s a staple topic in the food-science literature published by bodies such as the Institute of Food Technologists and the American Chemical Society.

    Liquid level: less than you think

    A braise is not a stew, and the difference is the liquid. Stewing submerges small pieces completely; braising uses large pieces sitting in liquid that comes perhaps halfway to two-thirds up the sides. This is not a stylistic quirk. Everything above the waterline cooks in the trapped steam under the lid, which is more than hot enough, while the exposed surfaces continue to brown gently and concentrate. Just as importantly, less liquid means a more concentrated sauce at the end — a braise drowned in stock will taste diluted no matter how good the ingredients were, and no amount of late reduction fully recovers it.

    Method Liquid Piece size Result
    Braise Halfway up Large, whole Concentrated sauce, sliceable meat
    Stew Fully covered Cubed Brothier, spoonable, one-pot meal
    Pot roast Shallow One large joint A braise by another name
    Confit Submerged in fat Portions No moisture loss to water; very rich

    Choose the vessel accordingly. A heavy pot with a tight lid — enameled cast iron is the classic for good reason — holds temperature steadily and returns condensing steam to the pot. The pot should also fit the food reasonably snugly; too large and you’ll be forced to add extra liquid just to reach the right level, diluting everything. A sheet of parchment pressed onto the surface under the lid (a cartouche) is a useful trick when your pot is slightly too big.

    Finishing, resting, and the overnight trick

    When the meat is finally tender, the sauce is usually not yet where it should be. Lift the meat out and keep it warm, then assess the liquid: if it’s thin, reduce it hard until it coats a spoon, letting the dissolved gelatin do most of the thickening work for you. Skim the fat that rises — a braise with a slick of grease on top tastes heavy no matter how well made. Then taste and adjust with the two things long cooking dulls: salt, and acid. A squeeze of vinegar, lemon, or a splash of wine at the very end wakes up a braise that tastes flat and muddy, and it is astonishing how often this single addition is the difference between “fine” and “excellent.” Fresh herbs stirred in off the heat do similar work.

    The most valuable piece of practical advice, though, is to make braises a day ahead. Cooled overnight in their liquid, the meat reabsorbs moisture and the flavors integrate in a way that genuinely improves the dish — this is one of the rare cases where “better the next day” is not sentimentality. It also makes fat removal trivial, since it solidifies on the surface and lifts off in a sheet. Cool the braise promptly rather than leaving it on the counter for hours, refrigerate it, and reheat gently to serving temperature; the USDA’s Food Safety and Inspection Service publishes clear guidance on safe cooling and reheating of cooked meat dishes, which is worth following for anything you’re storing.

    What braising ultimately teaches is a different relationship with time. Almost every other technique rewards attention and precision in the moment; braising rewards patience and then leaves you alone for three hours. It also quietly rewards thrift, turning the cuts that industrial food culture has taught us to overlook into the dishes people remember longest. Learn the chemistry — collagen becoming gelatin, fibers contracting, Maillard building flavor that the pot itself can never make — and you no longer need a recipe. You need a tough cut, a heavy pot, some liquid, a low oven, and the willingness to leave it alone until a skewer slides through without the slightest complaint.

  • Knife Skills Demystified: How Professional Chefs Approach Every Cut

    Knife Skills Demystified: How Professional Chefs Approach Every Cut

    Cooking Techniques & Skills

    Speed is the last thing professionals learn, not the first. What they actually build is a grip, a guide hand, and a reason for every cut — and all three are teachable in an afternoon.

    Watch a line cook break down a case of onions and the striking thing isn’t the speed — it’s the stillness. The elbow barely moves. The knife tip stays glued to the board. The left hand walks backward at a metronomic pace while the right hand does something that looks less like chopping than like a hinge opening and closing. There is no visible effort anywhere. Speed, when it eventually arrives, is a byproduct of that economy; it is never the goal, and cooks who chase it first tend to acquire bad habits and, sooner or later, stitches. The good news for home cooks is that everything producing that fluency is mechanical, explicable, and learnable in a single focused session with a bag of cheap onions.

    This matters beyond looking competent. Uniform cuts cook uniformly — a pan of vegetables where the pieces range from 3 mm to 15 mm will always contain some that are mushy and some that are raw, no matter how carefully you manage the heat. Clean cuts also damage less cell structure, which means less weeping, less bruising, and produce that stays crisp instead of going limp on the plate. And a cook who can reliably reduce ingredients to consistent shapes stops being dependent on pre-cut convenience products, which is where a substantial portion of both the cost and the flavor loss in home cooking hides. Knife work is the highest-leverage skill in the kitchen precisely because it sits upstream of everything else.

    You need three knives, not twelve

    Professional kitchens are full of specialized blades, but the overwhelming majority of the work in any kitchen — home or restaurant — is done with a very short list. Block sets exist to sell wood, not to solve problems.

    Knife Typical size What it’s genuinely for
    Chef’s knife (or gyuto) 20–25 cm Roughly 80–90% of all cutting: vegetables, herbs, meat, portioning
    Paring knife 8–10 cm In-hand work: peeling, coring, trimming, segmenting citrus
    Serrated / bread knife 20–25 cm Crusty bread, tomatoes, anything with a tough skin and soft interior
    Boning / flexible knife (optional) 13–15 cm Butchery, breaking down whole birds, removing silverskin
    Santoku (alternative) 16–18 cm A flatter-profiled substitute for a chef’s knife; suits push-cutting

    Fit matters more than brand. A knife should feel balanced near the bolster when you pinch it, and the handle should suit your hand size — a heavy German-style blade rewards a bigger hand and a rocking motion, while a lighter Japanese-style blade with a flatter edge suits push-cutting and smaller hands. If you can hold candidates before buying, do. If you can’t, prefer a mid-priced knife you will actually maintain over an expensive one you’ll be afraid to use.

    The pinch grip and the claw: the two things that change everything

    Most home cooks hold a knife by wrapping all four fingers around the handle like a hammer. Professionals don’t. They use a pinch grip: thumb and the side of the index finger grip the blade itself, just forward of the handle, with the remaining three fingers curled loosely around the handle behind. It feels wrong for about ten minutes and then feels obviously correct forever. Gripping the blade rather than the handle moves your point of control forward, past the pivot, which gives you far finer command of the edge and dramatically reduces wrist strain over long sessions. Nearly every other technique depends on having made this switch.

    The other half is the guide hand, held in what’s universally called the claw. Curl your fingertips under so the first knuckles project forward, and rest the flat of the blade against those knuckles. The knuckles become a physical wall the blade cannot cross, so the edge is guided rather than aimed — and the fingertips, tucked safely behind, are simply not in the path. You control thickness by how far you retreat the guide hand between cuts, not by eyeballing the blade. This is why professionals can look away from the board mid-conversation: they aren’t watching the knife, they’re feeling the knuckle contact. Practice the claw slowly on something forgiving like a zucchini until it stops requiring conscious thought.

    The board comes first

    Before any cutting: put a damp towel or a sheet of damp paper towel under your board. A board that slides is the single most common cause of home knife injuries, and the fix takes four seconds. Wood and quality plastic are both good surfaces; glass, stone, and ceramic destroy edges and should never be cut on.

    Motion: why chopping straight down is the problem

    A knife edge is a very fine wedge, and wedges work by traveling through material, not by being pressed into it. Pushing straight down crushes cell walls ahead of the edge, which is why chopping this way produces bruised herbs, weeping onions, and squashed tomatoes. Every professional cutting motion introduces horizontal travel. In the rock chop, the tip stays in contact with the board and the heel rises and falls, the blade rocking forward through the food — ideal for herbs, garlic, and general mincing with a curved European-style blade. In the push cut, the blade moves forward and down simultaneously, which suits flatter Japanese profiles and gives exceptionally clean slices. In the draw cut, you pull the blade back toward yourself as you cut, which is how you slice delicate proteins and soft bread without tearing.

    Whichever motion you use, let the knife’s weight do the work. If you find yourself leaning on the blade, the answer is almost never more force — it’s a sharper edge or a different motion. Keep your elbow close to your body and let the movement come from the shoulder and elbow rather than the wrist; wrist-driven cutting is both less accurate and considerably harder on the joint over years of cooking. And cut on a board at the right height: if your shoulders are creeping up toward your ears, the counter is too high, and a chopping board on a lower surface will serve you better for long prep sessions.

    The classical cuts — and why the dimensions matter

    Classical French cuts have precise names and precise measurements, which strikes many home cooks as needless fussiness until they understand the purpose: standardized dimensions guarantee standardized cooking times. When a recipe says brunoise, it is really saying “pieces that will soften in about ninety seconds.” The names are shorthand for behavior in a pan.

    Cut Dimensions Where it’s used
    Brunoise 3 mm cube Garnishes, sauces, anything that should melt away
    Julienne 3 × 3 × 50 mm Stir-fries, slaws, quick-cooking vegetables
    Batonnet 6 × 6 × 60 mm Crudités, fries, roasted vegetables
    Small dice 6 mm cube Mirepoix, soffritto, soup bases
    Large dice 20 mm cube Stews, braises, long-cooked dishes
    Chiffonade Fine ribbons Basil, mint, leafy greens — roll the leaves, then slice

    The sequence for all of the rectangular cuts is the same and worth internalizing once: square off the vegetable into a rectangular block, slice it into planks of the target thickness, stack the planks and cut them into sticks, then turn the sticks ninety degrees and cut across into cubes. Julienne cut crosswise becomes brunoise; batonnet cut crosswise becomes small dice. Two cuts, one method, six names. The trimmings from squaring off, incidentally, are not waste — they belong in a stock bag in the freezer.

    Sharpness is a safety feature, not a luxury

    The most counterintuitive thing professionals know is that dull knives cause more injuries than sharp ones. A sharp edge bites where you place it; a dull one skates across a curved onion or a tomato skin and then travels somewhere unplanned, usually with extra force behind it because you were pressing harder to compensate. Learning to maintain an edge is therefore not a hobbyist indulgence — it’s the single biggest safety improvement available to a home cook, alongside a stable board.

    Two distinct operations are involved, and confusing them is common. Honing with a steel doesn’t remove metal; it realigns an edge that has rolled over microscopically during use, and it should be done briefly and often — a few passes before each session. Sharpening actually grinds away metal to create a new edge, and is needed far less frequently: for a home cook, perhaps two to four times a year depending on use. Whetstones give the best results and are worth learning; pull-through sharpeners are convenient but aggressive; professional sharpening services are an excellent option if you’d rather not. Hand-wash and dry knives immediately rather than putting them in a dishwasher, where they knock against other items and where prolonged moisture and heat degrade both edges and handles. Store them on a magnetic strip, in a block, or in blade guards — never loose in a drawer, where the edges chip and your fingers go hunting blind.

    Hygiene deserves the same attention as sharpness. Use separate boards for raw meat and for produce, or wash thoroughly with hot soapy water between tasks, and pay attention to the knife itself — a blade that has broken down a chicken and then slices salad greens carries bacteria straight into food that won’t be cooked. Practical guidance on preventing cross-contamination is set out at FoodSafety.gov, and it’s the sort of thing worth reading once and then simply doing.

    How to actually practice

    Deliberate practice beats accumulated hours, and the curriculum is short. Buy a bag of onions — they’re cheap, they teach layered structure, and they punish sloppy technique visibly. Spend an hour on grip and claw alone, cutting far more slowly than feels natural, prioritizing uniformity over everything. Then work through carrots for the rectangular cuts, herbs for the rock chop and chiffonade, and a whole chicken when you’re ready for something with joints and connective tissue to read. Watching skilled hands helps enormously, and formal instruction is more accessible than it used to be; culinary schools such as the Culinary Institute of America run programs for non-professionals, and many local cooking schools teach knife skills as a standalone class.

    Expect the plateau. Somewhere in the second or third week, the technique will feel worse than your old hammer-grip hacking did, because you’ve dismantled an automatic habit and haven’t yet rebuilt it. This is normal and temporary, and pushing through it is the whole game. On the other side, something quietly significant happens: prep stops being the tedious obstacle standing between you and cooking, and becomes a pleasant, almost meditative part of it. That shift — more than any particular dice or julienne — is what knife skills actually buy you, and it’s why chefs who have long since stopped needing to prep still sometimes pull up a board and a case of onions just to feel their hands work.

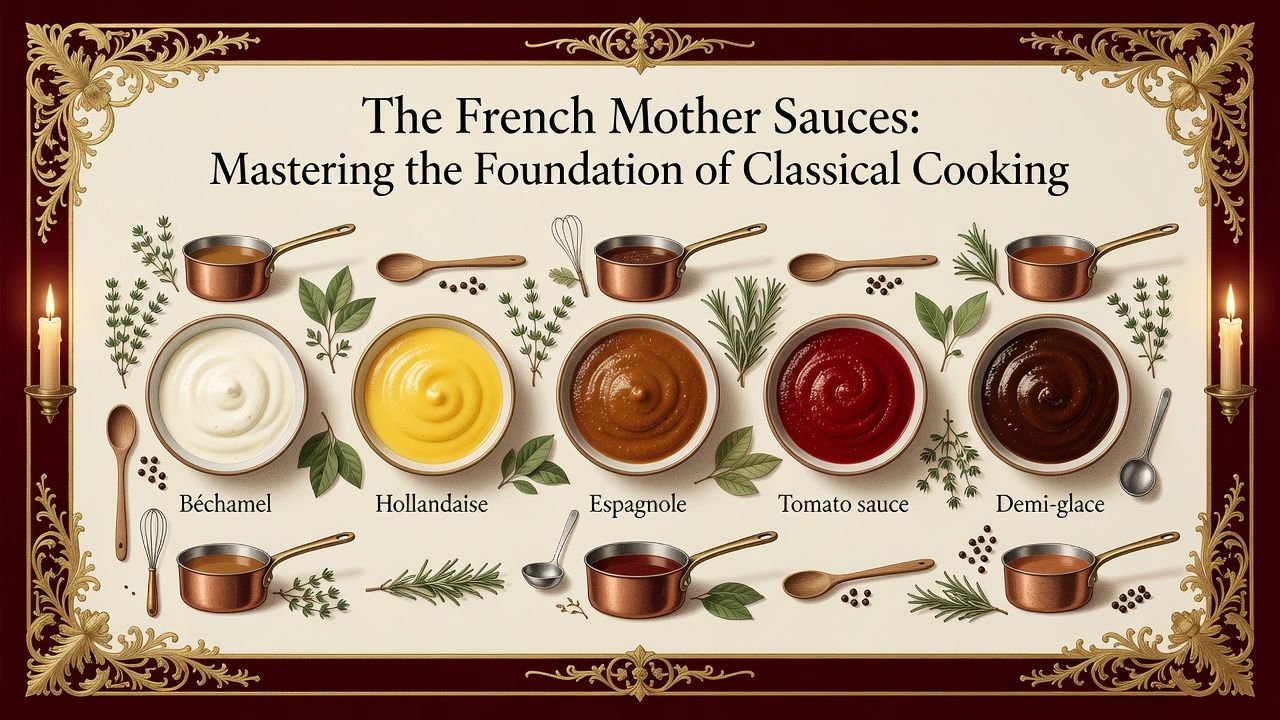
  • The French Mother Sauces: Mastering the Foundation of Classical Cooking

    The French Mother Sauces: Mastering the Foundation of Classical Cooking

    Cooking Techniques & Skills

    Five sauces. Hundreds of descendants. Learn the mothers and you stop following recipes — you start understanding why they work.

    There is a moment in every cook’s development when recipes stop being instructions and start being examples. For a great many cooks, that moment arrives with the mother sauces. Codified in French kitchens across the nineteenth and early twentieth centuries — first sketched by Antonin Carême, later refined into the modern five by Auguste Escoffier — the mother sauces are not five recipes to memorize but five structures to understand. Each is a liquid thickened or emulsified by a particular method, and each is designed to be a starting point rather than a destination. Once you can make them, you can make several hundred classical derivative sauces without looking anything up, because the derivatives are simply the mothers plus a well-chosen addition.

    That is the real argument for learning them, and it has nothing to do with nostalgia for white tablecloths. The mother sauces teach four transferable skills that show up in every cuisine on earth: how starch thickens liquid, how gelatin and reduction build body, how fat and water are forced into emulsion, and how to layer flavor into a liquid without muddying it. A cook who understands béchamel understands the sauce inside a lasagna, a mac and cheese, a Japanese-style gratin, and a Sri Lankan white curry sauce. A cook who understands hollandaise understands aioli, beurre blanc, and why a broken vinaigrette can be rescued. This is why classical technique still anchors the curriculum at institutions like the Culinary Institute of America — not as a museum piece, but as the most efficient scaffolding anyone has yet devised for teaching how liquids behave.

    The five mothers at a glance

    The modern canon settles on five. Three are thickened with roux — a cooked paste of equal parts fat and flour — one is thickened by reduction and gelatin, and one is an emulsion held together by egg yolk. Their differences matter less than their family resemblances:

    Mother sauce Liquid + thickener Classic children
    Béchamel Milk + white roux Mornay (cheese), soubise (onion), crème (cream), mustard sauce
    Velouté White stock (chicken, veal, fish) + blond roux Suprême, allemande, sauce vin blanc, poulette
    Espagnole Brown stock + brown roux + tomato & mirepoix Demi-glace, bordelaise, chasseur, Robert, madère
    Tomato Tomato, reduced (classically with roux and pork) Provençale, creole, puttanesca-style variations
    Hollandaise Butter emulsified into egg yolk + acid Béarnaise, choron, maltaise, mousseline

    Notice what the third column really shows: the derivatives are almost all one idea each. Mornay is béchamel plus cheese. Soubise is béchamel plus sweated onion. Béarnaise is hollandaise with a tarragon-shallot-vinegar reduction standing in for the lemon. This is the entire trick. Escoffier’s genius was less culinary invention than organizational clarity — he took a sprawling repertoire and revealed that it was a family tree. Learn five trunks and the branches take care of themselves.

    Roux: the technique inside three of the five

    Roux is flour cooked in fat, and it does two jobs at once. The starch granules in the flour are what will eventually swell and thicken your liquid; the cooking in fat coats those granules so they disperse instead of clumping, and simultaneously toasts away the raw, pasty flavor of uncooked flour. How long you cook it changes everything. A roux cooked only a minute or two stays pale and thickens powerfully. A roux cooked until it smells like toasted nuts and turns the color of peanut butter tastes vastly better but thickens noticeably less, because the prolonged heat begins breaking those starch chains down. This is a genuine trade-off, not a preference, and it explains why the darkest sauces need the most roux by volume.

    Roux stage Cook time Thickening power Use for
    White 2–3 min, no color Strongest Béchamel, cream soups
    Blond 5–8 min, pale gold Strong Velouté, gravies
    Brown 15–25 min, nutty aroma Moderate Espagnole, brown sauces
    Dark / chocolate 30–45 min, deep brown Weakest Gumbo and Cajun cooking

    The one rule that prevents nearly all lumps is a temperature difference between roux and liquid. Add cold or cool liquid to hot roux, or warm liquid to cooled roux — just don’t combine two things that are both piping hot, which sets the starch instantly on contact and traps flour in the middle of the clumps. Add the liquid in stages, whisking each addition to a smooth paste before the next, and thin gradually. And whatever the sauce, simmer it for at least ten minutes after it thickens: starch needs that time to hydrate fully, and a sauce that tastes faintly of raw flour is almost always a sauce that was rushed.

    The ratio worth memorizing

    For every 500 ml of liquid: about 30 g each of fat and flour gives a light, nappé sauce that coats a spoon; 45 g each gives a medium sauce for gratins; 60 g each gives a thick base for soufflés and croquettes. Everything else is seasoning.

    Béchamel and velouté: the same sauce, different liquid

    Béchamel is milk thickened with white roux, and it is the sauce most home cooks already make without knowing its name. Warm the milk, make the roux, combine, simmer gently, season with salt, white pepper, and — traditionally — a scrape of nutmeg and an onion studded with a clove and a bay leaf left to infuse. The nutmeg is not decoration; a very small amount does something specific to dairy, lifting it out of flatness without announcing itself. Strain, and you have the base of every gratin, croque monsieur, moussaka, and lasagna you will ever build. Add gruyère and parmesan and it becomes mornay, which is to say: it becomes the sauce that makes macaroni and cheese worth eating.

    Velouté is structurally identical, with white stock replacing the milk and a blond roux replacing the white. That single substitution changes the sauce’s entire character, because now the flavor is carried by the stock rather than by dairy — which means velouté is only ever as good as what you pour into it. This is the sauce that punishes bad stock and rewards good stock more directly than any other, and it is the reason classical kitchens obsess over stock-making. Finish a chicken velouté with cream and a little lemon and you have sauce suprême; finish it with a liaison of egg yolk and cream and you have allemande. Both are five minutes of work on top of a base you already made.

    Espagnole and the long road to demi-glace

    Espagnole is the most demanding of the five and the most transformed by modern practice. Classically it is brown stock — made from roasted bones — thickened with brown roux, deepened with tomato and a browned mirepoix of onion, carrot, and celery, then simmered for hours and skimmed relentlessly. Reduce it further with more brown stock and you get demi-glace, the glossy, profoundly savory reduction that underlies bordelaise, chasseur, and most of the classical meat sauces. It is a genuine project, and there is no honest way to pretend otherwise.

    Many contemporary kitchens have quietly abandoned the roux here, preferring a jus lié: a well-made brown stock reduced until the natural gelatin from the bones provides all the body needed, sometimes tightened at the last moment with a slurry of arrowroot or cornstarch. The result is cleaner, glossier, and less heavy, and most modern palates prefer it. Both approaches are legitimate; understanding espagnole matters because it teaches you what roasted-bone depth tastes like and how skimming affects clarity. If you make it once and never again, you will still cook differently afterward.

    Hollandaise: the emulsion that teaches everything

    Hollandaise is the outlier and the most instructive. There is no starch here at all — instead, egg yolk acts as an emulsifier, its lecithin allowing melted butter to be suspended in a small amount of water and acid rather than separating out. You whisk yolks with a splash of water and lemon juice or a vinegar reduction over gentle heat until they thicken and lighten (the sabayon stage), then add warm butter in a thin stream, whisking constantly, until the sauce becomes thick, glossy, and pourable. Season, and serve promptly.

    Every hollandaise failure is a version of the same two problems. Too much heat scrambles the yolks — work over barely simmering water, off the heat as needed, and never let the bowl touch the water. Too much butter too fast overwhelms the emulsion and it breaks, separating into greasy pools. The fix for a broken sauce is elegantly simple: start a fresh yolk with a teaspoon of water in a clean bowl, whisk it to a sabayon, then whisk the broken sauce into it slowly, as if it were the butter. Understanding this rescue is understanding emulsions in general, which is why the same move saves a split mayonnaise or beurre blanc.

    Hollandaise does come with a genuine food-safety consideration worth stating plainly: it contains egg yolks that are warmed but not fully cooked, and it is held at temperatures that are hospitable to bacteria. Use fresh, properly refrigerated eggs, consider pasteurized eggs if you are serving anyone pregnant, elderly, very young, or immunocompromised, make the sauce close to service rather than hours ahead, and don’t hold it lukewarm on the counter. Current guidance on egg handling and safe holding temperatures is available from FoodSafety.gov and the USDA’s Food Safety and Inspection Service, and it is worth a two-minute read before you make hollandaise for a crowd.

    Where to start, and what you actually gain

    Begin with béchamel, because it is forgiving and immediately useful, and make it three times in a week — once thin, once medium, once thick — so the ratios live in your hands rather than in a notebook. Move to velouté next, which teaches you to taste stock critically. Then hollandaise, which teaches emulsion and rewards practice more than any of the others. Tomato sauce and espagnole can wait; by the time you reach them you will already have absorbed the underlying grammar. Work in small batches, taste constantly, and season in stages rather than at the end, because a sauce that reduces concentrates its salt along with everything else.

    What you gain from this is not a repertoire of French dishes. It is a mental model. You will start seeing that a Japanese curry roux and a Cajun gumbo base are the same technique pushed to different colors, that a cheese sauce and a queso and a fondue are answering the same structural question in three ways, that the cream sauce clinging to your pasta and the gravy on your roast are cousins. Food scientists at organizations like the Institute of Food Technologists describe the same phenomena in terms of starch gelatinization and emulsion stability; the classical kitchen arrived at the identical knowledge through two centuries of stubborn repetition and gave it names you can say out loud. Learn the five mothers, and the next time a recipe tells you to whisk something into something else, you will already know what is about to happen — and, more usefully, what to do when it doesn’t.